 how-to
Bathroom Waterproofing Tips for Renovations
Table of Contents
- Why Bathroom Waterproofing Matters in a Renovation
- What You'll Need Before You Start Waterproofing
- Step 1: Prepare the Substrate for Waterproofing
- Step 2: Choose the Right Bathroom Tanking Kits
- Step 3: Apply the Waterproof Membrane System
- Step 4: How to Seal Bathroom Corners and Junctions
- Step 5: Bathroom Renovation Building Regulations You Must Follow
- Common Waterproofing Mistakes to Avoid
- Frequently Asked Questions
Last Updated: 1 October 2026
Why Bathroom Waterproofing Matters in a Renovation
Bathroom waterproofing is the process of sealing floors, walls and wet zones so water cannot soak into the structure beneath your tiles. Get it right and your renovation lasts decades. Get it wrong and you will be paying for it twice.
Water damage is one of the most common and costly problems in any bathroom refurbishment. A small gap around a shower tray can let water creep into floorboards and joists for months before you notice. By then, the fix is no longer a tube of sealant. It is new flooring, new plasterboard and possibly new timber.
This guide covers the full sequence, from preparing the substrate to meeting building regulations. Below, we will show you exactly how to plan each stage so your waterproofing holds up.
What You'll Need Before You Start Waterproofing
Gather your tools and materials before you strip anything out. A bathroom with no waterproofing and no supplies is a bathroom you cannot use.
Tools:
- Notched trowel and paint roller
- Mixing paddle and drill
- Silicone gun
- Spirit level
- Tape measure
- Utility knife
Materials:
- Tanking membrane or liquid waterproof coating
- Primer for the substrate
- Joint sealing tape and corner strips
- Silicone sealant
- Tile backer board for wet zones
- Dust sheets and protective gloves
Check that your chosen membrane suits the surface you have. A product made for concrete may not bond to plasterboard. Read the data sheet before you buy.
Step 1: Prepare the Substrate for Waterproofing
Preparation decides whether your membrane sticks or peels. A clean, dry, sound surface is the foundation of the whole job.
Start by removing old tiles, adhesive and any loose material. Fill cracks and holes with a suitable filler and let it cure fully. Sand down high spots so the surface is flat.
Next, vacuum and wipe the area. Dust stops primer and membrane from bonding. Let the surface dry completely.
Apply primer in line with the maker's guidance. This step is easy to rush and expensive to skip.
Step 2: Choose the Right Bathroom Tanking Kits
Bathroom tanking kits are packaged systems that include the membrane, primer, joint tape and corner seals needed for a wet zone. Buying a complete kit removes the guesswork of matching products.
Two main types are common:
| Kit Type | Best For | Key Trait |
|---|---|---|
| Liquid coating kits | Tiled walls and floors | Painted on, seals awkward shapes |
| Sheet membrane kits | Large flat areas | Fast to lay, consistent thickness |
| Board-based systems | Full wet rooms | Rigid base under tiles |
Liquid kits suit most renovations because they mould around pipes and corners. Sheet membranes work well on big, flat floors. Board systems add strength where a shower will sit.
Match the kit to your shower type. A walk-in wet room needs more coverage than a bath with an occasional shower. Buy enough to coat the full wet zone plus a margin.
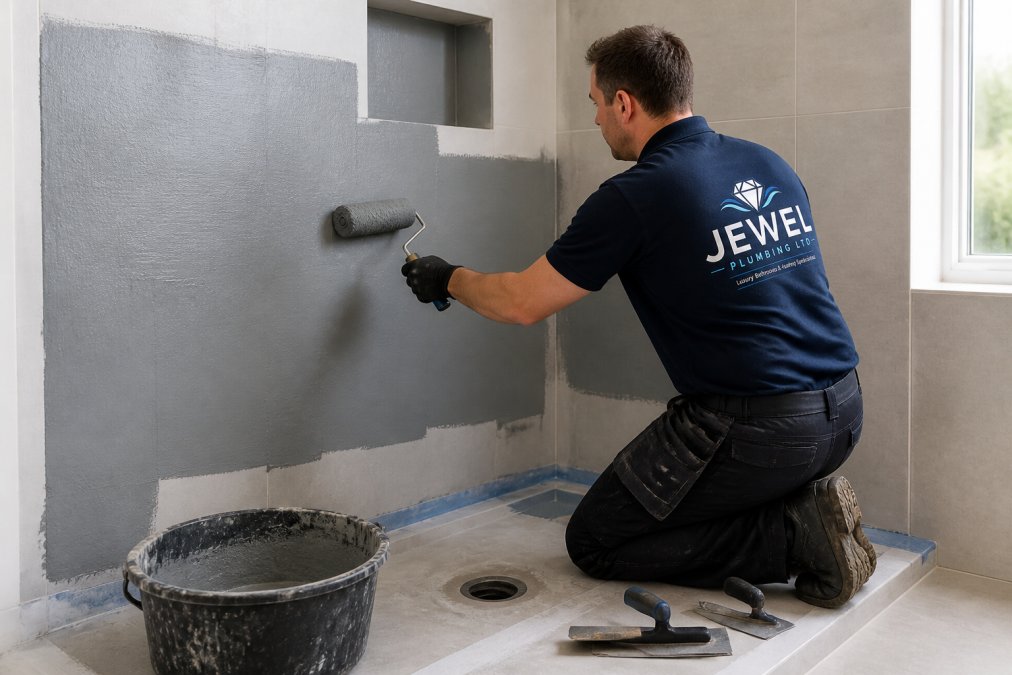
Step 3: Apply the Waterproof Membrane System
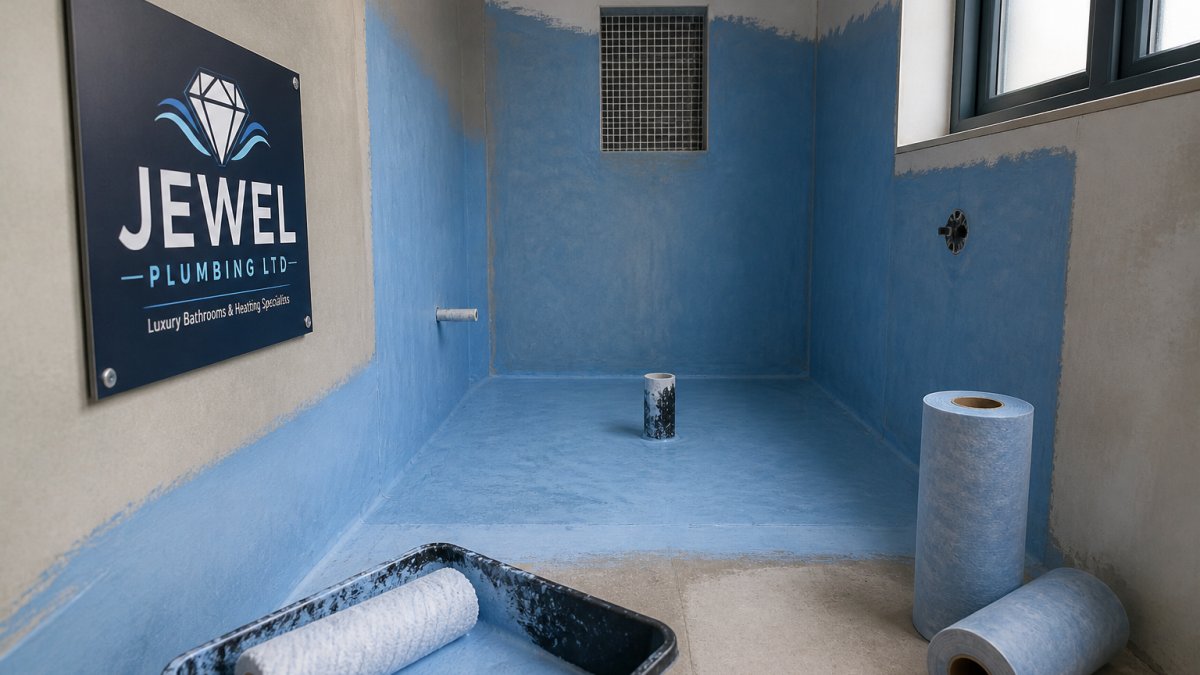
The membrane is the barrier that keeps water out of your structure. Apply it in thin, even coats and let each one cure.
Stir the product well, then apply the first coat with a roller or brush. Work from the corners outward. Let it cure for the time stated on the tub.
Apply the second coat at right angles to the first. This cross-hatch pattern closes any thin spots. Most systems need two coats, some need three.
Check coverage with a light. Thin patches show up as dull spots. Touch them in before moving on.
Step 4: How to Seal Bathroom Corners and Junctions
Corners and junctions are where leaks begin. Water finds the smallest gap, so these areas need tape, not just coating.
Apply joint sealing tape into the wet first coat while it is still tacky. Press it into the internal corners, floor-to-wall joints and around pipe entries. Smooth out any air bubbles.
Coat over the tape with the next layer of membrane. The tape must sit fully embedded between coats.
Around the shower tray, use a flexible sealant where the tray meets the wall. Movement between tray and wall opens rigid joints over time. A flexible sealant moves with it.
- Tape all internal corners
- Seal floor-to-wall joints
- Wrap pipe entries
- Seal the tray-to-wall gap last
Step 5: Bathroom Renovation Building Regulations You Must Follow
Bathroom renovation building regulations set the rules for drainage, ventilation, electrical safety and structural work. Waterproofing itself is not a single regulation, but it sits inside these requirements.
In wet rooms and some bathroom works, you may need to notify your local authority building control. Electrical work in a bathroom is a special location and must meet the wiring rules. Ventilation must remove moisture to prevent damp.
Check the official building regulations guidance before you start. Requirements vary by the type of work and the property. For electrical zones and approved documents, see the Approved Document guidance.
If you are unsure what applies to your project, ask a qualified professional. Getting this wrong can mean redoing work or failing an inspection.
Common Waterproofing Mistakes to Avoid
Most failures come from a handful of avoidable errors. Knowing them in advance saves you a second renovation.
- Skipping primer. Membrane will not bond to bare, dusty surfaces.
- One thin coat. A single coat rarely reaches the thickness needed.
- No corner tape. Coating alone will not hold at movement joints.
- Tiling too soon. Tiles laid before the membrane cures trap moisture.
- Ignoring the tray seal. A rigid joint here cracks and leaks.
- Forgetting ventilation. Trapped moisture undoes good waterproofing.
A common mistake is treating waterproofing as a quick job at the end. It is the first job that matters most.
At Jewel Plumbing, our team handles luxury bathroom refurbishments across the West Midlands, from tanking to tiling, so the whole system works together. For homeowners who want a guide to bathroom ventilation to pair with their waterproofing, checking airflow is a smart final step.
Frequently Asked Questions
Do I really need to waterproof my entire bathroom?
Not every wall requires full tanking, but any area that gets regularly wet should be protected. At minimum, tank the shower enclosure, around the bath, and the floor. In a wet room, the whole room needs waterproofing. Building regulations do not demand full tanking in standard bathrooms, but it is best practice to protect zones that see frequent moisture.
What is the difference between tanking and waterproofing?
Tanking is a method of waterproofing that creates a continuous barrier, usually with a liquid-applied membrane or a sheet system. Waterproofing is the broader goal of preventing water ingress. Tanking is what you do to achieve waterproofing in a bathroom. Products like bathroom tanking kits include primers, tapes, and membranes designed for this purpose.
Can I tile directly onto plasterboard in a bathroom?
Plasterboard is not suitable for wet areas unless it is moisture-resistant and properly tanked. Standard plasterboard will deteriorate when exposed to water. For showers and wet rooms, use a tile backer board or a waterproof membrane over the substrate. Always seal joints and corners with flexible tape before tiling.
How do I know if my bathroom renovation needs a waterproof membrane?
If your renovation involves a shower, wet room, or any area where water will splash or pool, a waterproof membrane is essential. Even if you are only replacing tiles, if the substrate is not already waterproof, you should add a membrane. Check for signs of damp, mould, or loose tiles, which indicate existing water damage.
Waterproofing a bathroom is unforgiving work, and one missed corner can undo a whole renovation. Jewel Plumbing specialises in luxury bathroom installations, expert plumbing support and reliable heating services for homeowners across the West Midlands. Our 5-star rated team handles preparation, tanking and tiling as one job, so nothing is left to chance. Get started with Jewel Plumbing and protect your renovation from the ground up.